
Paint your own cabinets. The professional way.
Pro-tested physical prep and application tools and supplies, portioned for one kitchen — so you can get a professional-looking brush-and-roll finish without a $1,500+ spray setup.
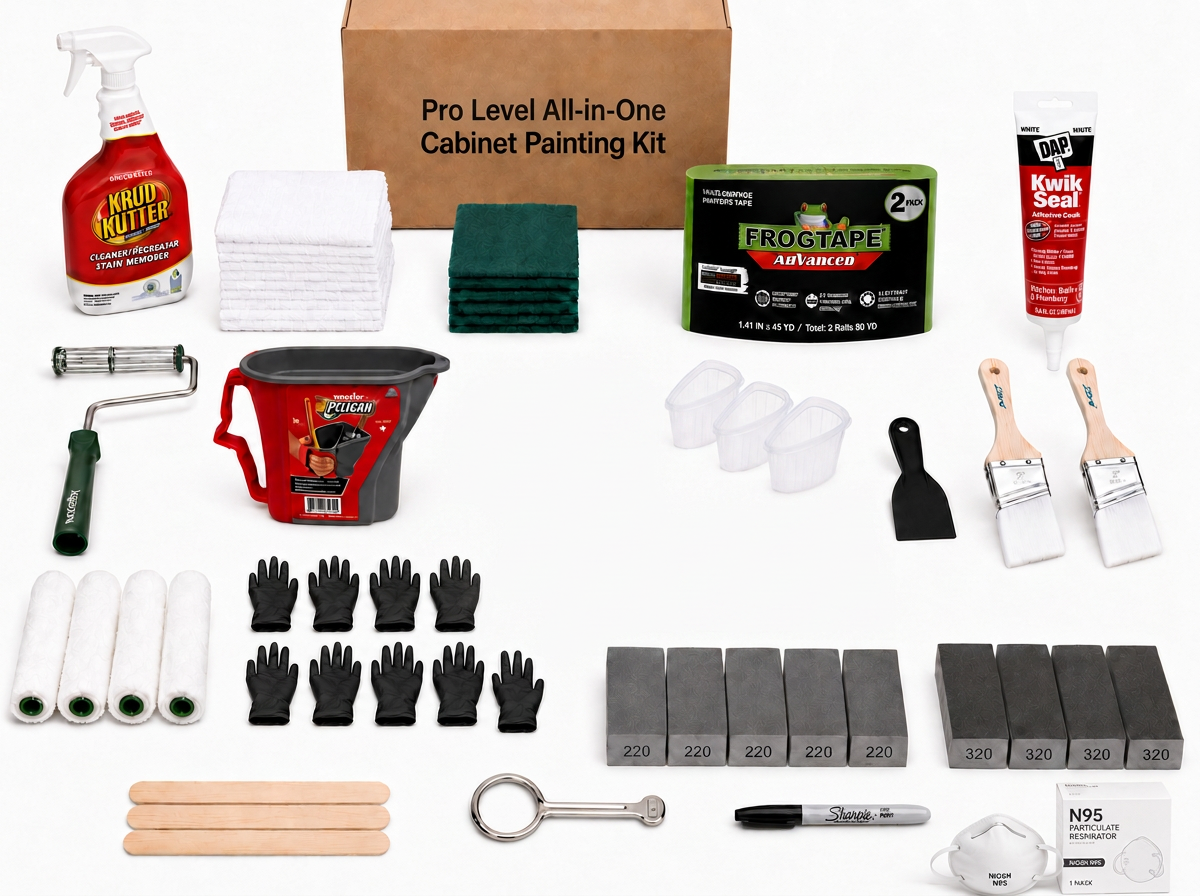
Professional products. One box.
Physical prep and application tools and supplies, portioned for one kitchen. Paint and primer are purchased separately.
Prep supplies
Degreaser, towels, scuff pads, gloves, tape, caulk, and sanding sponges.
Application tools
Detail brushes, fine-finish roller covers, roller frame, paint pail, and liners.
Contractor-tested
Physical products selected for a professional-looking brush-and-roll cabinet finish.
Learn the process. Get the supplies.
The written B&B Step-by-Step Cabinet Painting Guide is free. Watch the free video separately, or buy the physical tools and supplies for your project.
Full Process Video Tutorial
Watch the complete cabinet painting process from start to finish.
Get the Free VideoPro Level All-in-One Cabinet Painting Kit
Contractor-tested physical prep and application tools and supplies, portioned for one kitchen. Paint and primer sold separately.
Shop the KitWhich option is right for you?
| What you get | Full Process Video TutorialFree | Pro Level All-in-One Cabinet Painting Kit$199 |
|---|---|---|
| 53-min video tutorial | ||
| Physical prep and application supplies | ||
| Free shipping to 48 contiguous states | N/A |
Need contractor-tested tools and supplies in one box? The kit is $199, with free shipping to the 48 contiguous states.
Shop the KitPro Level All-in-One Cabinet Painting Kit.
Contractor-tested cleaning, masking, sanding, and application supplies portioned for one kitchen — shipped free to the 48 contiguous states.
Coming to the DIY Shop
Replacement Consumables
SoonRestock sanding, masking, and cleaning supplies.
B&B Branded Products
SoonShop-tested products under the B&B name.
Recommended Pro Tools
SoonThe sprayers, sanders, and lights we actually use.
Recommended Products
SoonCurated picks with links to buy.
Other Wood Refinishing
SoonDecks, fences, furniture, and more.
Why I Made This Kit
A short video on why I put this kit together and exactly what it's designed to help you do.
SAVE THOUSANDS. DO IT THE RIGHT WAY.
Hire a Professional
- Typical professional cabinet painting cost: $2,000–$7,000+
- Higher cost depending on kitchen size and scope
Pro Level All-in-One Cabinet Painting Kit
- $199 kit with free shipping to 48 states
- Paint and primer purchased separately/local
- Professional-selected tools and supplies
Potential savings: THOUSANDS
Get contractor-tested physical products for your DIY cabinet painting project.
Buy the Kit —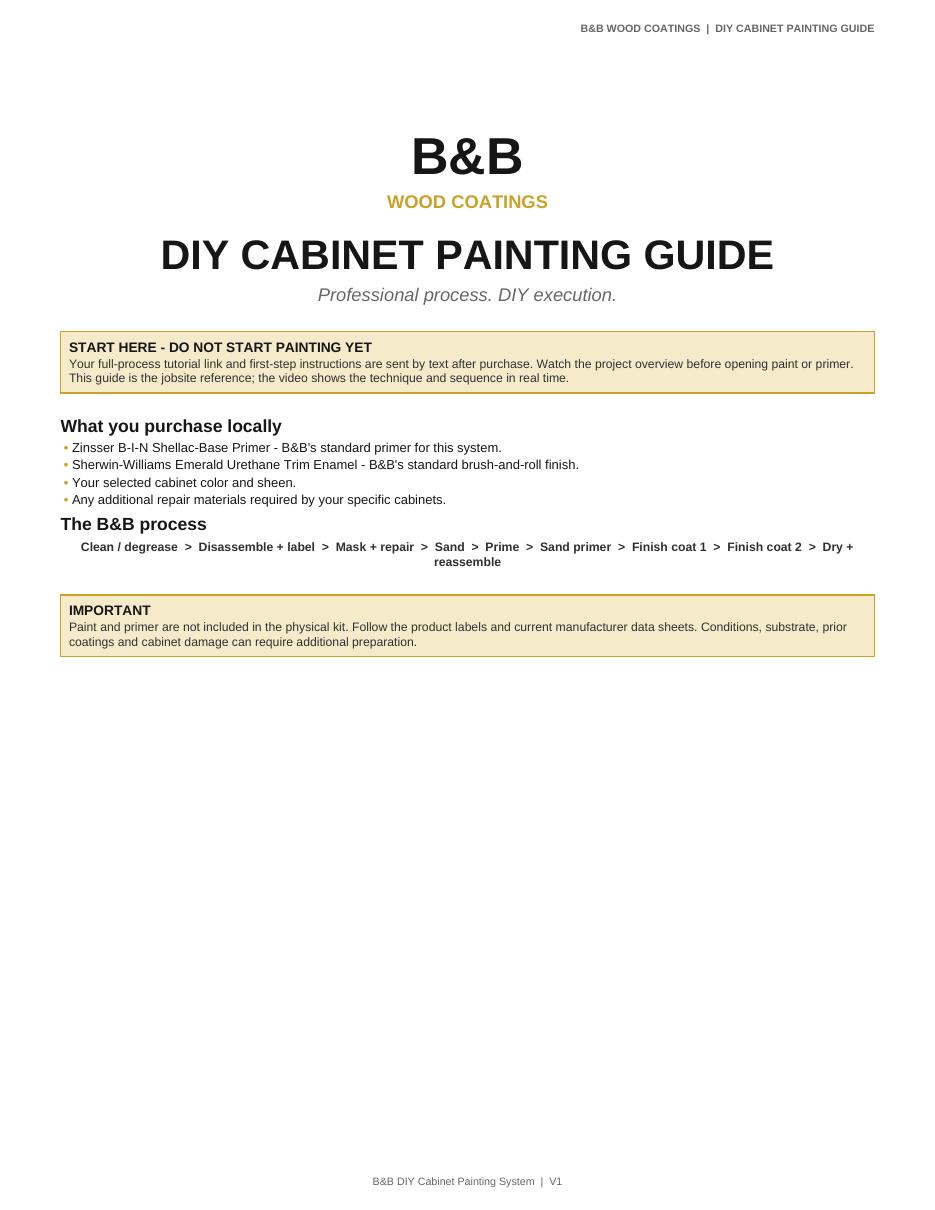
Start with the free DIY cabinet painting guide.
Get the same step-by-step process B&B uses — cleaning, prep, priming, painting, drying and reassembly — in a free PDF. No kit required.
- 8-page printable PDF
- Same process used on Lexington kitchens
- Works for kitchens, bathrooms, furniture, and built-ins
Homeowners who want it done right — by themselves.
- You want a professional-looking result but the budget says DIY this time.
- You've watched enough videos to know prep matters — you just want the right stuff in one box.
- You want the product research already done — we tested multiple roller covers, brushes, primers, and paints to find the best combination for a brush-and-roll cabinet finish.
- You want a process from someone who fixes failed DIY paint jobs for a living.
We get called to fix DIY cabinets every month.
B&B Cabinet Coatings professionally refinishes cabinets across Lexington and the Bluegrass — and on the service side, we spray doors and drawer fronts for a factory-grade finish. A big part of that work is repairing or redoing kitchens homeowners painted themselves — not because they did a sloppy job, but because they used the wrong products or skipped the prep that makes a finish last.
We tested multiple roller covers, brushes, primers, and paints to find the combination that works best for a brush-and-roll DIY finish. The kit gives you the right quantities, the right order of operations, and a finish that holds up — without a $1,500+ spray setup.
Rather have us do it? See our 5–7 day serviceExact quantities. Nothing you won't use.
Eight steps. No shortcuts.
- 01
Clean / Degrease
Every surface gets degreased twice. Kitchen grease is the #1 reason DIY paint jobs fail.
- 02
Disassemble & Label
Doors, drawers, and hardware come off and get numbered so everything goes back where it belongs.
- 03
Mask & Prep
Counters, floors, walls, and appliances are masked off so you can work fast without worrying about drips.
- 04
Sand
Scuff sand to dull the existing finish and give the primer something to grab.
- 05
Prime
Apply Zinsser BIN Shellac Primer. It locks to the old finish, blocks tannin bleed-through on oak and cherry, and gives the topcoat a solid base.
- 06
Sand Primer
A light sanding of the primer is what gives the topcoat that smooth, factory feel.
- 07
Apply Finish Coats
Two thin coats of a cabinet-grade enamel — thin coats level out, thick coats sag.
- 08
Reassemble
Let it cure, reinstall doors and drawers using your labels, and install hardware.
Before you order.
Does the kit include paint?+
No. Paint and primer are not included. For the top coat, we recommend Sherwin-Williams Emerald Urethane Trim Enamel, tinted to your color choice at your local Sherwin-Williams store. A typical kitchen needs one gallon of paint for 2–3 finish coats.
Does the kit include primer?+
No. Primer is not included for the same reason as paint — we want you to buy fresh product locally. We recommend Zinsser BIN Shellac Primer, available at Lowe's and Home Depot. A typical kitchen needs one gallon for 1–2 coats.
How large of a kitchen will one kit handle?+
One kit is portioned for a typical kitchen of roughly 20–30 doors and drawer fronts. Very large kitchens, islands with paneling, or built-ins may need a second kit or replacement consumables.
Do I need a paint sprayer?+
No. The kit is built around a brush-and-roll process using fine-finish rollers that leave minimal texture. If you own a sprayer, the same prep steps apply and you'll get an even smoother result.
Can I complete the project using a brush and roller?+
Yes — that's what the kit is designed for. The included fine-finish microfiber rollers and angled brush are what we recommend to homeowners who don't want to buy or learn a sprayer.
What paint and primer should I purchase?+
We recommend Zinsser BIN Shellac Primer (found at Lowe's and Home Depot) and Sherwin-Williams Emerald Urethane Trim Enamel, tinted to your color choice at your local Sherwin-Williams store. A typical kitchen needs one gallon of primer and one gallon of paint to complete 1–2 coats of primer and 2–3 coats of paint.
How long does the process take?+
Plan on a long weekend to a full week depending on kitchen size and dry times. Most homeowners spend 2 days on cleaning, disassembly, and prep, then 2–4 days on priming, sanding, and finish coats.
Is this suitable for previously painted cabinets?+
Yes, as long as the existing paint is well-adhered. Peeling or chipping paint must be sanded back to a sound surface first. If a previous DIY job has failed badly, our professional refinishing service may be the better route.
How do I fill dents and scratches before painting?+
This is an optional step for cabinets with damage. After cleaning and sanding, press wood filler into any dents, scratches, or gouges using the kit's included putty knife, let it dry, then sand the repair flush with a 220-grit sanding sponge before priming. Wood filler is not included in the kit — we offer the DAP Plastic Wood-X Wood Filler as an optional $6.99 add-on with your kit purchase.
Can I upgrade handles and knobs, and how do I fill the old holes?+
Yes — another optional step. If your new hardware doesn't line up with the old holes, fill them with wood filler or a glued-in dowel, sand flush with a 220-grit sanding sponge, prime, and paint. A drill/driver is needed to make new holes, and a cabinet hardware jig makes alignment much easier. We offer a Cabinet Hardware Installation Jig as an optional $19.99 add-on with your kit purchase.